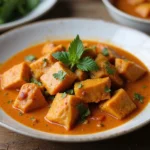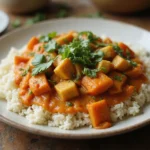
Seafood Curry Recipes with Coconut Milk is a vibrant dish that combines the richness of coconut milk with the fresh flavors of seafood.
The creamy texture and aromatic spices create a delightful balance that tantalizes the taste buds.
I first fell in love with this dish during a coastal visit to Southeast Asia, where each bowl told a story of local culinary heritage.
Perfect for a weeknight dinner or a special gathering, this restaurant-style recipe is surprisingly simple to prepare at home.
The History and Cultural Significance
• Seafood Curry Recipes with Coconut Milk traces its origins to Southeast Asia, where it was originally created by coastal communities relying on the ocean’s bounty.
• The dish evolved over decades as spices were introduced through trade routes, eventually becoming the beloved version we know today.
• In many cultures, this dish traditionally appears at family gatherings and festive celebrations, symbolizing abundance and community.
• While many variations exist across different regions, the authentic version maintains a balance of sweetness and spice that sets it apart from imitations.
Recipe Overview
Nutritional Information (per serving)
Ingredients
Essential Equipment Guide
Heavy-bottomed Pot: A heavy-bottomed pot is essential for even heat distribution, preventing scorching while simmering the curry. Look for one with a tight-fitting lid to retain moisture and flavors during cooking.
Wooden Spoon: This tool is perfect for stirring without scratching your pot, allowing you to evenly combine ingredients without damaging non-stick surfaces. A long handle can help reach into deep pots.
Measuring Cups and Spoons: Accurate measurements ensure the right balance of flavors. Invest in a set that includes both dry and liquid measuring tools for best results.
Preparation Methods
Tempering Spices: This technique involves cooking spices in oil to release their essential oils and enhance their flavors. It’s crucial for building a deep, aromatic base for your curry. Ensure the oil is hot but not smoking to avoid burning the spices.
Simmering: Simmering allows the flavors to meld and develop over time without boiling over. Maintain a gentle simmer to keep the seafood tender and prevent it from becoming rubbery. Stir occasionally and monitor for doneness.
Layering Flavors: Adding ingredients at different stages of cooking helps build complexity. Start with aromatics, then add curry paste, followed by liquids and seafood. This method ensures each element is cooked perfectly and contributes to the overall taste.
Step 1: Prepare Ingredients

Begin by gathering all your ingredients on a clean workspace.
Chop the onion, bell pepper, and green beans while keeping the seafood ready for quick addition.
Make sure to have your measuring cups and spoons handy for precise measurements.
This step ensures that you’re organized and the cooking process flows smoothly.
Step 2: Heat the Oil

In a heavy-bottomed pot, heat the oil over medium heat until shimmering.
Make sure it’s hot enough to sauté the onions but not smoking to avoid burning.
This step is crucial for creating a flavorful base for your curry.
Swirl the pot to evenly distribute the oil before adding onions.
Step 3: Sauté Aromatics

Add the finely chopped onion to the hot oil and sauté until translucent, about 5 minutes.
Stir frequently to avoid browning the onions, which could change the flavor profile.
You want them soft and aromatic, laying the foundation for your curry.
Once translucent, it’s time to add the red curry paste.
Step 4: Incorporate Curry Paste

Add the red curry paste to the pot and stir well to combine with the sautéed onions.
Cook for about 2 minutes until the paste becomes fragrant, which intensifies its flavor.
This step is crucial for infusing the base with the signature spicy and aromatic notes of the curry.
Watch for the paste to darken slightly, indicating it’s ready for the next ingredients.
Step 5: Add Coconut Milk

Pour in the coconut milk gradually, stirring to fully incorporate it with the curry paste.
Bring the mixture to a gentle simmer, allowing the flavors to meld beautifully.
Look for small bubbles forming on the surface, indicating it’s heating properly.
This creamy base will balance the spiciness of the curry paste.
Step 6: Season the Curry

Add fish sauce and brown sugar to the simmering coconut milk, stirring to dissolve.
Taste the sauce at this point to adjust the seasoning according to your preference.
The balance of salty, sweet, and creamy should be harmonious.
If it tastes flat, consider adding a bit more fish sauce or lime juice.
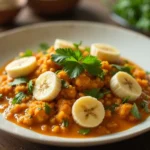
Step 7: Add Vegetables

Introduce the sliced bell pepper and green beans to the pot, stirring well.
Let them simmer in the curry for about 5 minutes until they are tender but still vibrant.
This step adds color and texture, making the dish visually appealing and nutritious.
Monitor the vegetables to ensure they don’t overcook.
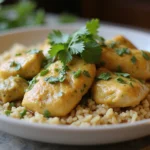
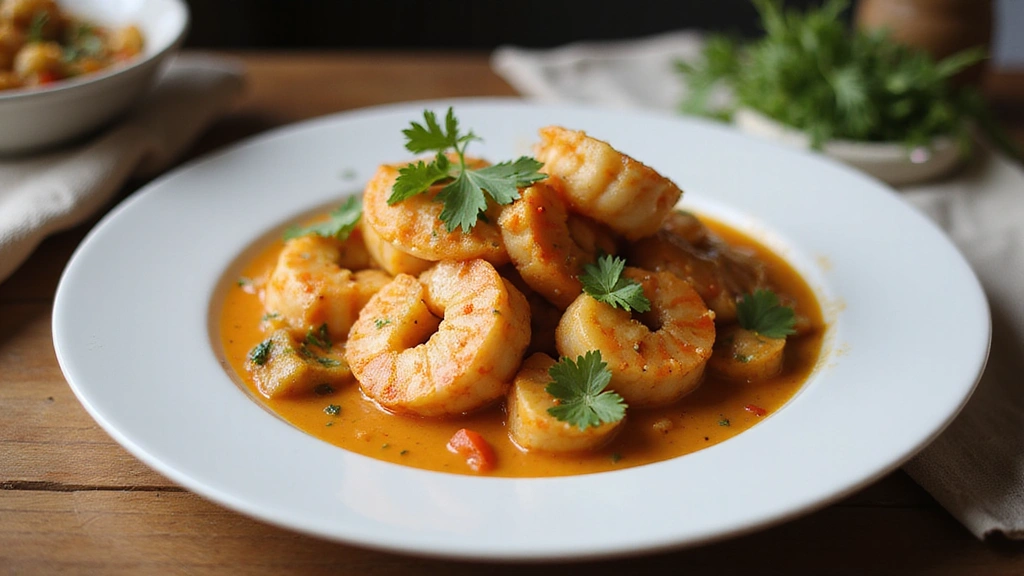
Step 8: Add Seafood

Gently add the shrimp and fish fillets to the simmering curry, making sure they are submerged.
Cook for about 5-7 minutes, or until the seafood is opaque and cooked through.
Be careful not to overcook the seafood, as it can become tough.
Stir occasionally and check the seafood for doneness.
Step 9: Final Adjustments

Once the seafood is cooked, squeeze fresh lime juice into the curry and stir well.
This brightens the flavors and adds a refreshing finish to the dish.
Taste again to make any final seasoning adjustments.
If you desire more heat, consider adding a pinch of chili flakes.
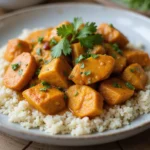
Step 10: Serve and Garnish

Ladle the seafood curry into bowls and garnish with fresh cilantro for a pop of color and flavor.
Serve immediately with steamed jasmine rice or crusty bread.
This final presentation elevates the dish, making it restaurant-worthy.
Enjoy the warm, aromatic flavors of your homemade seafood curry.


![Newness 2 Pack Soup Ladle, [Rustproof, Heat Resistance, Integral Forming]](https://m.media-amazon.com/images/I/21+eCIV5auL._SL500_.jpg)


Critical Timing and Temperature Guide
Cooking Seafood: Seafood should be cooked until opaque, usually around 5-7 minutes depending on the type. Look for uniform color and firmness. Avoid cooking too long to prevent rubberiness.
Simmering Sauce: Maintain a gentle simmer for 10-15 minutes to blend flavors. Avoid a rolling boil that can separate the sauce. Stir occasionally to prevent sticking.
Vegetable Tenderness: Cook vegetables until just tender, about 5 minutes. They should retain some crunch and vibrant color. Overcooking can lead to mushy vegetables.
Pro Tips for Seafood Curry Recipes With Coconut Milk Restaurant-style
• Ingredient Selection: Choose the freshest seafood available; it significantly impacts the dish’s overall flavor and texture.
• Preparation Secret: Marinate seafood in lime juice for 15 minutes before cooking to enhance flavor and tenderness.
• Temperature Management: Ensure your coconut milk is at room temperature before adding to prevent curdling.
• Texture Enhancement: Gently stir the seafood to avoid breaking it apart, ensuring nicely intact pieces.
• Flavor Layering: Consider adding a splash of fish sauce at the end for an extra umami boost.
• Make-Ahead Strategies: Prepare the curry base a day in advance and add seafood just before serving to maintain freshness.
• Restaurant-Quality Finishing Touches: Drizzle with a bit of high-quality olive oil just before serving for a glossy finish.
• Equipment Optimization: Use a pot with a heavy bottom to avoid burning and achieve even cooking.
Troubleshooting Common Issues
• Flavor Too Mild: If your curry lacks flavor, boost it with more curry paste or a splash of fish sauce. Taste and adjust as you go for balance.
• Seafood Overcooked: If the seafood becomes rubbery, reduce cooking time next time. Monitor closely as seafood cooks quickly.
• Curry Too Thin: To thicken the curry, simmer uncovered for a few more minutes to reduce liquid. You can also add a cornstarch slurry.
• Too Spicy: If it’s too spicy, balance it with more coconut milk or a little sugar to cut the heat.
• Texture Off: If the curry is grainy, ensure that the coconut milk isn’t boiling too vigorously, which can separate it.
Variations and Regional Differences
• Thai Variation: Thai seafood curry often includes lemongrass and kaffir lime leaves, adding a citrusy flavor that brightens the dish.
• Indian Variation: In Indian cuisine, coconut curry may feature mustard seeds and curry leaves, introducing a different spice profile and aroma.
• Malaysian Variation: Malaysian recipes might use tamarind for tanginess and include a variety of seafood like squid and crab.
• Modern Interpretations: Contemporary adaptations might substitute traditional seafood with plant-based alternatives for a vegan version.
Food Science Behind the Recipe
• Emulsification: The combination of coconut milk and oil creates an emulsion that gives the curry its creamy texture. Understanding emulsification helps achieve the right consistency.
• Flavor Compound Activation: Cooking spices in hot oil activates their flavor compounds, enhancing the overall taste of the dish. This is why tempering spices is a crucial step.
• Protein Denaturation: Cooking seafood causes proteins to denature, changing its structure and making it opaque. Knowing this helps in timing the cooking process.
Frequently Asked Questions
What’s the most common mistake people make when preparing Seafood Curry? A common mistake is overcooking the seafood, which turns it rubbery. To avoid this, monitor cooking times closely and remove from heat once opaque.
Can I prepare components of this dish in advance? Yes, you can chop vegetables and prepare the curry base a day ahead. Store them separately in the fridge to maintain freshness.
How do I adapt this recipe for dietary restrictions? To make it gluten-free, ensure fish sauce is gluten-free. You can also use tofu for a vegetarian version.
What’s the best way to store and reheat leftovers? Store leftovers in an airtight container in the fridge for up to 3 days. Reheat on low heat in a pot, stirring gently.
Can I freeze this dish? Yes, it freezes well! Store in an airtight container for up to 2 months. Thaw in the fridge overnight and reheat gently.
What wine or beverages pair best with this dish? A crisp Sauvignon Blanc complements the richness of the curry and balances the spice.
How can I scale this recipe up for a crowd? Simply multiply the ingredients by the number of servings needed, ensuring you have a large enough pot to accommodate the increased volume.
What side dishes complement this recipe best? Jasmine rice or garlic naan are perfect accompaniments, soaking up the flavorful curry sauce.
How do professional chefs elevate this dish for restaurant service? Chefs often focus on presentation, using fresh microgreens or edible flowers for garnishing and serving in elegant bowls.
Serving and Presentation Guide
• Traditional Presentation: Serve in a deep bowl with a garnish of fresh herbs on top and a side of jasmine rice or roti. This traditional style highlights the rich colors and textures of the dish.
• Modern Plating Ideas: Use a wide, shallow plate and artfully drizzle the curry around the seafood. Garnish with microgreens and a wedge of lime for a contemporary look.
• Accompaniment Suggestions: Pair with pickled vegetables or a light cucumber salad to balance the richness of the curry.
• Special Occasion Presentation: For celebrations, consider serving in individual coconuts or hollowed-out pineapples for a tropical flair.
Conclusion
I hope this Seafood Curry with Coconut Milk recipe inspires you to bring the flavors of Southeast Asia into your kitchen.
With its rich, creamy texture and aromatic spices, it’s sure to impress anyone you share it with.
Don’t hesitate to experiment with your favorite seafood and vegetables for a personalized touch.
Enjoy each bite as you savor the warmth and comfort this dish brings!