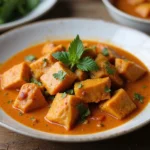
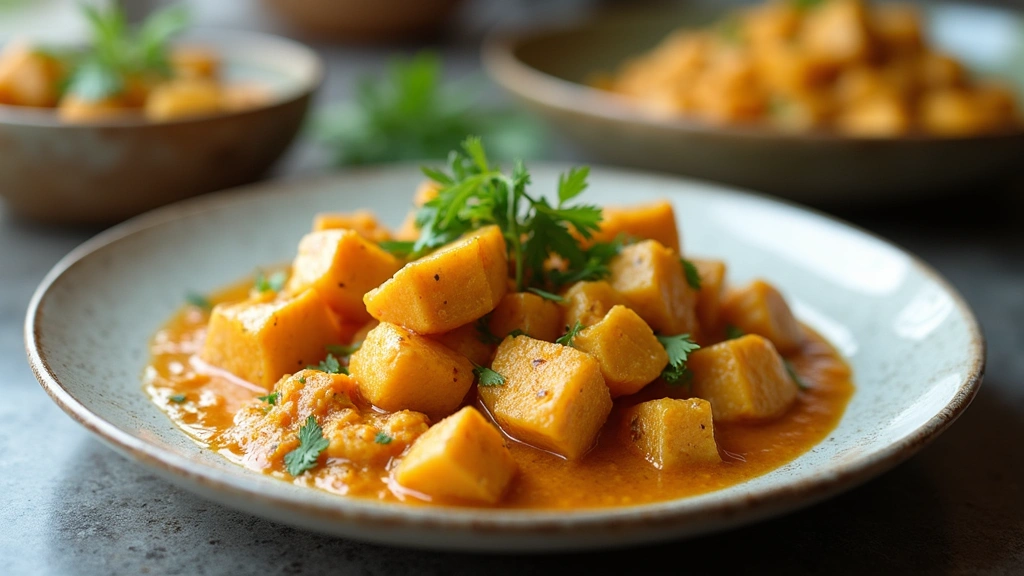
Vegetable Coconut Curry is a vibrant dish that marries the richness of coconut milk with the fresh flavors of seasonal vegetables.
The creamy texture and aromatic spices create a comforting yet exotic experience that tantalizes the palate.
I first fell in love with this dish during a visit to Southeast Asia, where street vendors served it in fragrant bowls that warmed the soul.
Perfect for a weeknight dinner or a weekend gathering, this curry is not only nutritious but also incredibly versatile.
The History and Cultural Significance
• Vegetable Coconut Curry traces its origins to Southeast Asia, particularly in Thailand and India, where curries have been a staple for centuries.
• The dish evolved over decades as spices and techniques were introduced through trade routes, incorporating local ingredients and flavors.
• In many cultures, this curry traditionally appears during festivals and communal gatherings, symbolizing abundance and hospitality.
• While many variations exist across different regions, the authentic version maintains a balance of creamy coconut and vibrant spices that sets it apart from imitations.
Recipe Overview
Nutritional Information (per serving)
Ingredients
Essential Equipment Guide
Heavy-bottomed Pot: This tool is crucial for distributing heat evenly, preventing burning and ensuring the curry simmers gently. Look for a pot with a thick base and high sides to hold the ingredients without spilling.
Wooden Spoon: A sturdy wooden spoon is perfect for stirring the curry without scratching your pot. It allows for gentle mixing, which helps maintain the integrity of the vegetables.
Measuring Cups and Spoons: Accurate measurements are essential for balancing the flavors in your curry. Invest in a set of measuring cups and spoons to ensure consistency every time you make this dish.
Preparation Methods
Chopping Techniques: Using the right knife skills for chopping vegetables can greatly affect the cooking time and texture. Aim for uniform pieces to ensure even cooking.
Simmering: This technique involves cooking the curry at a low temperature to meld flavors together without boiling. Keep an eye on the consistency and adjust the heat as necessary.
Flavor Balancing: Taste as you cook to adjust the seasoning. Adding small increments of salt, acid, and sweetness throughout the cooking process helps achieve a well-rounded flavor.


Step 1: Prepare Ingredients

Begin by gathering all your ingredients on a clean countertop.
Wash and chop the vegetables into uniform pieces for even cooking.
Make sure to measure out the coconut milk and curry paste beforehand to streamline the cooking process.
Having everything ready will help you move quickly through the recipe.
Step 2: Heat the Oil

Place a heavy-bottomed pot over medium heat and add the coconut oil.
Allow the oil to melt and coat the bottom of the pot, which will prevent sticking.
Wait until the oil shimmers but does not smoke, indicating it’s ready for the next ingredients.
This step is crucial for developing a rich base flavor.
Step 3: Sauté Aromatics

Add the diced onion to the pot and sauté for about 5 minutes until translucent.
Stir in the minced garlic and grated ginger, cooking for another minute until fragrant.
Be careful not to let the garlic burn, as it can create a bitter taste.
This step builds the aromatic foundation of your curry.
Step 4: Add the Curry Paste

Stir in the red curry paste and cook for 2-3 minutes to release its oils and deepen the flavor.
Make sure to mix it well with the sautéed aromatics, coating them evenly.
The paste should become fragrant and slightly darker in color, indicating it’s ready for the next step.
This technique intensifies the flavor profile of the curry.
Step 5: Pour in Coconut Milk

Slowly pour in the coconut milk, stirring to combine it with the curry paste and aromatics.
Ensure there are no lumps of curry paste remaining for a smooth sauce.
Bring the mixture to a gentle simmer, which will help meld the flavors.
This step adds creaminess and richness to the curry.
Step 6: Add Broth and Vegetables

Pour in the vegetable broth and bring the curry back to a simmer.
Add the sliced bell pepper, carrot, and broccoli, stirring to incorporate.
Let the curry simmer for about 10 minutes, allowing the vegetables to soften but still retain their crunch.
This step ensures the vegetables are cooked to the perfect texture.
Step 7: Incorporate Spinach

Once the other vegetables are tender, stir in the spinach until it wilts, which should take about 2 minutes.
The spinach adds both nutrition and a pop of color to your dish.
Be careful not to overcook the spinach, as it can lose its vibrant green hue.
This step enhances the nutritional profile of the curry.
Step 8: Season to Taste

Taste the curry and adjust the seasoning with soy sauce, lime juice, salt, and pepper as needed.
A well-seasoned curry balances sweetness, acidity, and saltiness.
Make small adjustments and taste repeatedly to find the perfect balance for your palate.
This step is vital for achieving a flavorful final dish.
Step 9: Serve the Curry

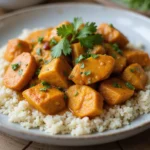
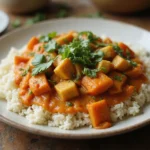
Serve the Vegetable Coconut Curry hot over steamed rice or with naan bread.
Garnish with fresh cilantro and a squeeze of lime for an extra burst of flavor.
Make sure to present it in a colorful bowl to enhance its visual appeal.
This step elevates the dining experience, making it inviting and delicious.
Step 10: Enjoy!

Sit down with your loved ones and enjoy the rich flavors and textures of your homemade curry.
Pair it with a refreshing drink to complement the spices.
Take a moment to appreciate the vibrant colors and enticing aromas.
This step completes your cooking journey, bringing everyone together for a delightful meal.
Critical Timing and Temperature Guide
Sautéing Aromatics: Cook the onions until translucent, about 5 minutes, to develop sweetness without burning them. Watch closely and adjust heat as necessary to prevent browning too much.
Simmering Vegetables: The vegetables should be simmered for about 10 minutes until tender but still crisp. Check for doneness by piercing with a fork; they should be firm but not raw.
Finishing Touches: Add spinach last to preserve its color and nutrients, which takes only about 2 minutes. Avoid overcooking to maintain vibrant green color.
Pro Tips for Vegetable Coconut Curry Recipes Nutritious & Delicious
• Ingredient Selection: Choose high-quality coconut milk for a creamier texture. Look for brands that have no added preservatives for the best flavor.
• Preparation Secret: Allowing the curry to sit for a few minutes after cooking enhances the flavors as they meld together.
• Temperature Management: Keep your heat moderate while simmering to avoid burning the bottom. Stir occasionally to ensure even cooking.
• Texture Enhancement: Add vegetables in stages according to their cooking times. For example, add quicker-cooking items like spinach at the end.
• Flavor Layering: Build layers of flavor by tasting and adjusting seasonings throughout the cooking process.
• Make-Ahead Strategies: Prepare the curry base in advance and store it in the refrigerator. Add fresh vegetables just before serving to retain their crunch.
• Restaurant-Quality Finishing Touches: Garnish with toasted coconut flakes or a drizzle of chili oil for an elegant touch.
• Equipment Optimization: Use a heavy-bottomed pot to ensure even heat distribution and prevent burning.
Troubleshooting Common Issues
• Texture Too Watery: This can happen if too much broth is added. To fix it, simmer uncovered for a few more minutes to reduce excess liquid. Always measure broth carefully in the future.
• Flavors Unbalanced: If the curry tastes bland, it may need more seasoning. Gradually add salt or soy sauce and taste frequently until balanced.
• Vegetables Overcooked: If vegetables turn mushy, try adding them later in the cooking process next time. Adjust timing based on the type of vegetable.
• Too Spicy: If the curry is too spicy, add a little more coconut milk to tone it down. You can also serve with a side of yogurt to help balance the heat.
• Burnt Bottom: If the bottom of the pot burns, reduce the heat and stir more frequently. Use a heavy-bottomed pot to prevent this in future attempts.
• Too Thick: If the curry is thicker than desired, simply add more broth or coconut milk until you reach the desired consistency.
Variations and Regional Differences
• Thai Green Curry: This version uses green curry paste and a different array of vegetables like eggplant and Thai basil, offering a unique flavor profile.
• Indian Vegetable Curry: Incorporates a range of spices such as turmeric and garam masala, and may include yogurt for creaminess, showcasing different regional flavors.
• Malaysian Curry: Often includes lemongrass and kaffir lime leaves for a fresh, zesty flavor, along with a variety of seafood or tofu.
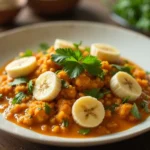
• Modern Interpretations: Many contemporary recipes use alternative proteins like chickpeas or lentils, catering to plant-based diets while maintaining the essence of the dish.
Food Science Behind the Recipe
• Emulsification: The process of combining fat (coconut milk) and water (broth) creates a stable mixture that enhances the curry’s creaminess.
• Caramelization: Cooking onions until caramelized develops natural sugars, which add depth and sweetness to the overall flavor profile.
• Flavor Compounding: Layering spices and aromatics at different stages of cooking allows for complex flavor development, creating a well-rounded dish.
Frequently Asked Questions
What’s the most common mistake people make when preparing Vegetable Coconut Curry? Not balancing the flavors is a common issue. Always taste as you cook and adjust seasonings gradually to achieve the right flavor profile.
Can I prepare components of this dish in advance? Yes! You can chop vegetables and make the curry base ahead of time. Store in the refrigerator for up to 2 days before adding fresh ingredients.
How do I adapt this recipe for dietary restrictions? For vegan versions, ensure you use vegetable broth and check curry paste ingredients. You can also substitute coconut milk with almond or soy milk for lower fat options.
What’s the best way to store and reheat leftovers? Store in an airtight container in the refrigerator for up to 3 days. Reheat on the stove over low heat, adding a splash of broth to loosen it.
Can I freeze this dish? Yes, Vegetable Coconut Curry freezes well. Allow it to cool completely before transferring to a freezer-safe container. It can be frozen for up to 3 months.
What wine or beverages pair best with this dish? Pair with a fruity white wine like Riesling or a light beer to complement the spices and creaminess.
How can I scale this recipe up for a crowd? Simply double or triple the ingredients, ensuring you have a large enough pot to accommodate the increased volume.
What side dishes complement this recipe best? Serve with steamed rice, naan bread, or a fresh cucumber salad to balance the richness of the curry.
How do professional chefs elevate this dish for restaurant service? Chefs often finish with a drizzle of high-quality olive oil or flavored oils, and they may add fresh herbs for garnish to enhance presentation.
Serving and Presentation Guide
• Traditional Presentation: Serve in a deep bowl, garnished with fresh cilantro and lime wedges. This enhances both the visual appeal and flavor.
• Modern Plating Ideas: Consider using a shallow plate with a colorful swirl of sauce and the curry arranged artistically for a contemporary look.
• Accompaniment Suggestions: Pair with jasmine rice or whole grain naan to complement the curry’s flavors.
• Special Occasion Presentation: For celebrations, serve in individual ramekins topped with microgreens or edible flowers for a sophisticated touch.
Conclusion
Vegetable Coconut Curry is a dish that brings warmth and comfort to any table.
Its vibrant flavors and nutritious ingredients make it a favorite for both family dinners and gatherings.
I encourage you to try this recipe and enjoy the delightful experience it brings to your kitchen.