South Indian curry recipes represent a vibrant tapestry of flavors, spices, and textures that are both nourishing and satisfying.
With their unique combination of aromatic spices and fresh vegetables, these dishes offer a delightful experience that is both comforting and healthy.
I first fell in love with South Indian cuisine during a family trip to Chennai, where the rich culinary culture left a lasting impression on me.
Perfect for any occasion, these vegetarian dishes not only cater to health-conscious eaters but also celebrate the art of cooking with wholesome ingredients.
The History and Cultural Significance
• South Indian curry recipes vegetarian healthy options trace their origins to the southern regions of India, where they have been crafted for centuries as part of daily meals.
• The dish evolved over decades as local ingredients like coconut, lentils, and a variety of vegetables were incorporated, eventually becoming the beloved versions we know today.
• In South India, these curries traditionally appear during festivals and family gatherings, symbolizing hospitality and abundance.
• While many variations exist across different states like Tamil Nadu and Kerala, the authentic versions maintain a balance of spices and fresh ingredients that set them apart from imitations.
Recipe Overview
Nutritional Information (per serving)
Ingredients


Essential Equipment Guide
Cast Iron Skillet: This tool is vital for achieving the authentic flavor profile through even heat distribution. Look for one that retains heat well and has a smooth surface for easy cooking. Alternatives like non-stick pans can work, but they may not provide the same depth of flavor.
Blender or Food Processor: Used for creating smooth pastes from spices and vegetables, a high-quality blender ensures a creamy consistency that’s essential for a good curry. If you don’t have one, a mortar and pestle can be a great alternative, although it may require more effort.
Measuring Cups and Spoons: Precision in measuring ingredients is crucial for balancing flavors. Invest in a good set to ensure you get the right proportions, making it easy to replicate the recipe consistently.


Preparation Methods
Tempering: This technique involves heating oil and adding spices like mustard seeds to release their essential oils, enhancing the dish’s flavor. Make sure the oil is hot enough to pop the seeds for maximum effect, and watch for the seeds to turn a light brown color before adding other ingredients.
Blending: For a smooth curry base, blend the coconut and spices until creamy. This is essential for achieving the luxurious texture typical of South Indian curries. Use a high-speed blender for best results, and be cautious of hot ingredients when blending.
Layering: This technique involves adding ingredients in stages to build flavor. Start with aromatics, then add spices, followed by vegetables and liquids. This method ensures each component releases its flavor at the right time, resulting in a well-balanced dish.


Step 1: Heat the Oil

In a cast iron skillet, heat the coconut oil over medium heat.
Allow it to become hot but not smoking, which will bring out the flavors of the oil.
You want to see a shimmer on the surface, indicating it’s ready for cooking.
Carefully add mustard seeds and listen for them to pop, which means the oil is at the right temperature.


Step 2: Add Aromatics

Once the mustard seeds start popping, add diced onions to the skillet.
Sauté the onions until they become translucent, around 5 minutes.
Stir frequently to ensure even cooking and prevent sticking.
The onions should have a sweet aroma when they’re ready to proceed.
Step 3: Incorporate Vegetables

Next, add the diced bell pepper and cubed potatoes to the skillet.
Sauté for about 5-7 minutes until the vegetables start to soften.
Look for the bell peppers to become vibrant in color and the potatoes to lose their raw edge.
Stir occasionally to ensure even cooking throughout.
Step 4: Add Spices

Sprinkle turmeric and sambar powder over the vegetables in the skillet.
Stir well to coat the vegetables in the spices, allowing the flavors to develop.
Cook for another 2 minutes until the spices become fragrant.
This step is crucial for building the flavor base of the curry.
Step 5: Pour in Coconut Milk

Slowly pour in the coconut milk while stirring the mixture.
Allow it to combine fully with the vegetables and spices, creating a creamy sauce.
Bring the mixture to a gentle simmer, watching for small bubbles to form.
This will help meld the flavors together beautifully.
Step 6: Simmer

Reduce the heat to low and let the curry simmer for 15-20 minutes.
This allows the potatoes to cook through and the flavors to meld together.
Stir occasionally and check for doneness; the potatoes should be fork-tender.
Adjust seasoning if needed by adding salt or extra spices.
Step 7: Add Spinach

Once the potatoes are tender, stir in the fresh spinach.
Cook for an additional 2-3 minutes until the spinach wilts down.
Look for the vibrant green color to brighten the dish, indicating freshness.
This step adds both nutrition and a pop of color to your curry.
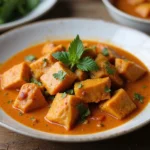
Step 8: Finish and Garnish

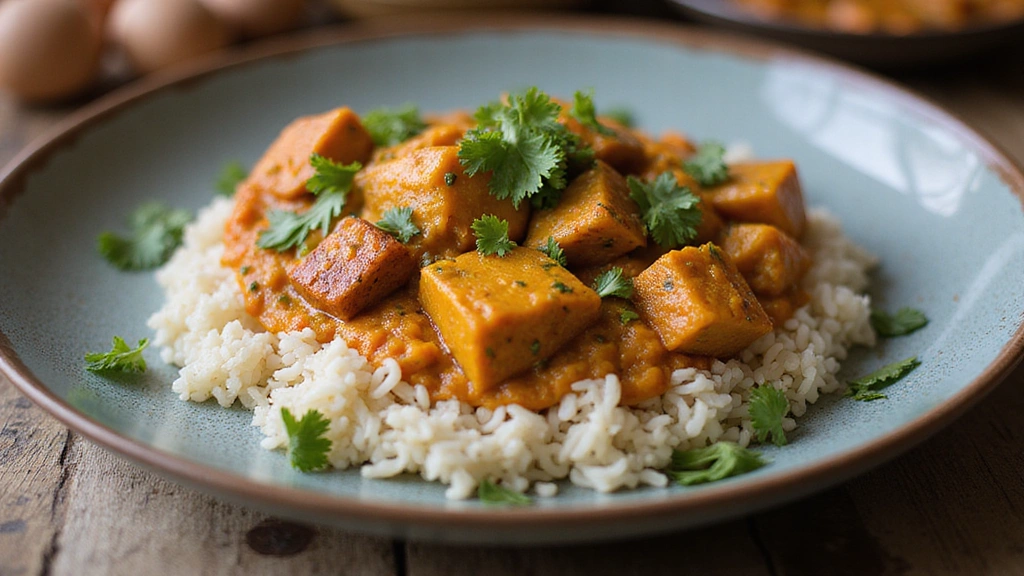
Remove the skillet from heat and squeeze fresh lemon juice over the curry.
Gently stir to combine the flavors, enhancing the overall taste.
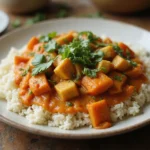
Transfer to a serving dish and garnish with chopped cilantro for freshness.
This final touch elevates the presentation and flavor profile.
Critical Timing and Temperature Guide
Heating the Oil: Heat the oil over medium heat until shimmering but not smoking. This typically takes about 2-3 minutes. If the oil smokes, it is too hot, and you should start over to avoid burnt flavors.
Simmering the Curry: After adding the coconut milk, bring to a gentle simmer for 15-20 minutes. Look for small bubbles on the surface; if it’s boiling too vigorously, reduce the heat to maintain a gentle simmer.
Cooking Potatoes: Ensure the potatoes are fork-tender after simmering. This can take up to 20 minutes, depending on the size of the cubes. If they are still hard, continue simmering and check every few minutes.
Pro Tips for South Indian Curry Recipes Vegetarian Healthy Options
• Ingredient Selection: Use fresh, local vegetables and high-quality coconut milk for the best flavor and nutrition.
• Preparation Secret: Toast your spices briefly before adding them to enhance their flavors significantly.
• Temperature Management: Start with medium heat to properly sauté your onions and spices, then lower it to simmer once the liquids are added.
• Texture Enhancement: Ensure your potatoes are evenly cubed for uniform cooking and texture.
• Flavor Layering: Add spices in stages rather than all at once to deepen the flavor profile.
• Make-Ahead Strategies: Prepare your curry base (oil, onions, spices, and coconut milk) in advance and refrigerate for up to 2 days.
• Restaurant-Quality Finishing Touches: Drizzle with high-quality olive oil or a sprinkle of toasted nuts for added richness.
• Equipment Optimization: Use a heavy-bottomed pot for even heat distribution and to prevent burning.
Troubleshooting Common Issues
• Flavor Too Mild: This may occur if spices were added too late or not enough were used. To fix, adjust by adding more sambar powder or salt. Taste and add gradually until desired flavor is achieved.
• Texture Too Watery: If your curry is too runny, simmer uncovered for a few extra minutes to thicken. Alternatively, mix a small amount of cornstarch with water and stir it in to thicken.
• Vegetables Undercooked: If your potatoes are not tender, continue simmering until they are fork-tender. Ensure that they are cut into small, even pieces for quicker cooking.
• Too Much Coconut Flavor: If the coconut milk is overpowering, balance it with a splash of lime juice or vinegar to cut through the richness.
• Spices Not Well Integrated: To ensure spices blend well, add them to the oil before other ingredients and sauté them briefly to release their flavors.
Variations and Regional Differences
• Chettinad Style: This variation incorporates a richer blend of spices and includes roasted spices for an intensified flavor profile. It often uses tamarind for a tangy twist.
• Keralan Style: Known for its generous use of coconut, this version includes lots of fresh seafood or chicken, but can be adapted to keep it vegetarian by adding more vegetables.
• Andhra Style: Typically spicier, this variation uses more chili powder and is often served with a side of yogurt to mellow the heat.
• Modern Interpretations: Contemporary recipes may include quinoa or lentils for added protein, and use alternative milks like almond or soy instead of coconut.
Food Science Behind the Recipe
• Emulsification: The blending of coconut milk with spices creates an emulsion that results in a creamy and cohesive sauce. Understanding how to emulsify liquids can help you achieve a smooth consistency in curries.
• Maillard Reaction: When sautéing onions, the Maillard reaction occurs, creating rich flavors and aromas. This is why browning ingredients is crucial for developing depth in your dish.
• Gelatinization: The process of cooking potatoes allows their starches to gelatinize, which gives them a creamy texture. Cutting them into even pieces ensures consistent gelatinization and doneness.
Frequently Asked Questions
What’s the most common mistake people make when preparing South Indian curry? The most common mistake is not allowing spices to bloom properly in hot oil, which can lead to a bland flavor. Always heat the oil adequately before adding spices.
Can I prepare components of this dish in advance? Yes, you can prepare the vegetable base and store it in the refrigerator for up to 2 days. Just add the coconut milk and fresh vegetables when ready to cook.
How do I adapt this recipe for dietary restrictions? To make it gluten-free, ensure your sambar powder is gluten-free, and for a nut-free version, avoid any nut garnishes.
What’s the best way to store and reheat leftovers? Store in an airtight container in the fridge for up to 3 days. Reheat gently on the stovetop or in the microwave, adding a splash of water to prevent drying.
Can I freeze this dish? Yes, it can be frozen for up to 3 months. Thaw it overnight in the fridge and reheat on the stove, adding a little coconut milk if needed to restore creaminess.
What wine or beverages pair best with this dish? A crisp Riesling or a light lager works well, as the sweetness balances the spices.
How can I scale this recipe up for a crowd? Simply multiply the ingredients by the number of servings you need, ensuring you have a large enough pot to accommodate cooking.
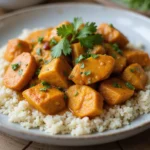
What side dishes complement this recipe best? Serve with steamed rice or roti, and a side of tangy cucumber raita to balance the spices.
How do professional chefs elevate this dish for restaurant service? Chefs often add a variety of garnishes, such as edible flowers or microgreens, and serve in unique dishware to enhance the visual appeal.
Serving and Presentation Guide
• Traditional Presentation: Serve the curry in a traditional banana leaf or a decorative earthen pot. Garnish with fresh cilantro and a wedge of lime on the side for a vibrant touch.
• Modern Plating Ideas: Use a white plate to highlight the colors of the curry, and create a swirl of coconut cream on top for an artistic finish. A sprinkle of toasted coconut can add texture.
• Accompaniment Suggestions: Pair with fluffy basmati rice, crispy papadums, and a refreshing cucumber salad dressed with yogurt.
• Special Occasion Presentation: For celebrations, consider layering the curry with saffron-infused rice in a large serving dish, garnishing with fried onions and nuts for an extravagant touch.
Conclusion
I hope this South Indian curry recipe inspires you to explore the incredible flavors of vegetarian cooking.
With its rich history and hearty ingredients, this dish is sure to become a favorite in your home.
Don’t hesitate to share your culinary creations with friends and family, as food is best enjoyed together.