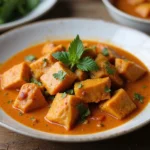
Curry recipes without coconut milk but still creamy offer a delightful twist on a beloved classic.
The richness and depth of flavor achieved through alternative creamy ingredients create a comforting dish that appeals to a wide range of palates.
I first encountered these creamy curries during a culinary workshop, where chefs showcased innovative techniques to achieve a luxurious texture without traditional coconut milk.
Whether it’s a weeknight dinner or a weekend gathering, these recipes promise to impress with their flavor and ease of preparation.
The History and Cultural Significance
• Curry recipes without coconut milk but still creamy have their roots in Indian and Southeast Asian cuisines, where diverse ingredients are celebrated.
• Over time, these dishes have evolved, incorporating local dairy products like yogurt or cream to achieve creaminess while respecting traditional flavors.
• In many cultures, such curries are served during festivals and celebrations, symbolizing hospitality and abundance.
• Authentic versions maintain a balance of spices and creaminess that distinguishes them from their coconut-based counterparts.
Recipe Overview
Nutritional Information (per serving)
Ingredients
Essential Equipment Guide
High-Quality Chef’s Knife: A sharp, well-balanced chef’s knife is essential for precision chopping of ingredients. Look for a knife with a comfortable grip and a blade that maintains sharpness over time.
Heavy-Bottomed Pot or Dutch Oven: This equipment ensures even heat distribution, preventing burning while allowing for slow cooking. A cast-iron Dutch oven is ideal for its ability to retain heat.
Wooden Spoon: A sturdy wooden spoon is perfect for stirring thick mixtures without scratching your cookware. Choose one with a comfortable handle for better control.
Preparation Methods
Sautéing: This technique involves cooking ingredients in oil over medium heat. It allows the onions and spices to develop their flavors before adding other components. Ensure not to burn the onions for best results.
Simmering: A gentle cooking method that involves cooking the curry at low heat for an extended period. This helps meld the flavors together and ensures the vegetables are tender without becoming mushy.
Incorporating Dairy: Adding yogurt or cream at the right moment is crucial to avoid curdling. Incorporate it at low heat and stir constantly for a smooth finish.
Step 1: Prepare Ingredients

Start by gathering all your ingredients on the countertop.
Chop the vegetables and set them aside for easy access.
Measure out spices and yogurt to have them ready when needed.
This preparation will streamline your cooking process.
Step 2: Sauté Onions

Heat the vegetable oil in a heavy-bottomed pot over medium heat.
Add the finely chopped onions and sauté until they become translucent, about 5-7 minutes.
Stir occasionally to prevent burning and ensure even cooking.
This step develops the base flavor of your curry.
Step 3: Add Spices

Once the onions are translucent, add the curry powder, turmeric, cumin, and salt.
Stir the spices into the onions and cook for an additional minute to release their aromas.
This technique is crucial for enhancing the overall flavor profile of the dish.
Make sure the spices don’t burn; adjust the heat if necessary.
Step 4: Incorporate Vegetables

Add the diced bell pepper and sliced carrots to the pot.
Stir well to coat the vegetables with the spices and onions.
Cook for about 5 minutes until they start to soften but still retain some crunch.
This adds texture and freshness to your curry.
Step 5: Add Broth

Pour in the chicken or vegetable broth, stirring well to combine everything.
Increase the heat and bring the mixture to a gentle boil.
Once boiling, reduce the heat to low and let it simmer for about 15-20 minutes.
This allows the flavors to meld beautifully.
Step 6: Stir in Yogurt

Once the vegetables are tender, remove the pot from heat.
Gradually stir in the yogurt, ensuring it blends smoothly into the curry.
This step adds creaminess and a slight tang to the dish.
Be careful not to boil the curry after adding yogurt to prevent curdling.
Step 7: Adjust Seasoning

Taste the curry and adjust seasoning if necessary, adding more salt or spices.
Let it sit for a few minutes to allow the flavors to develop further.
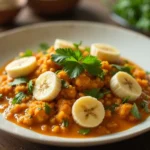
Consider adding fresh herbs like cilantro for an extra layer of flavor.
This final adjustment ensures the perfect balance.
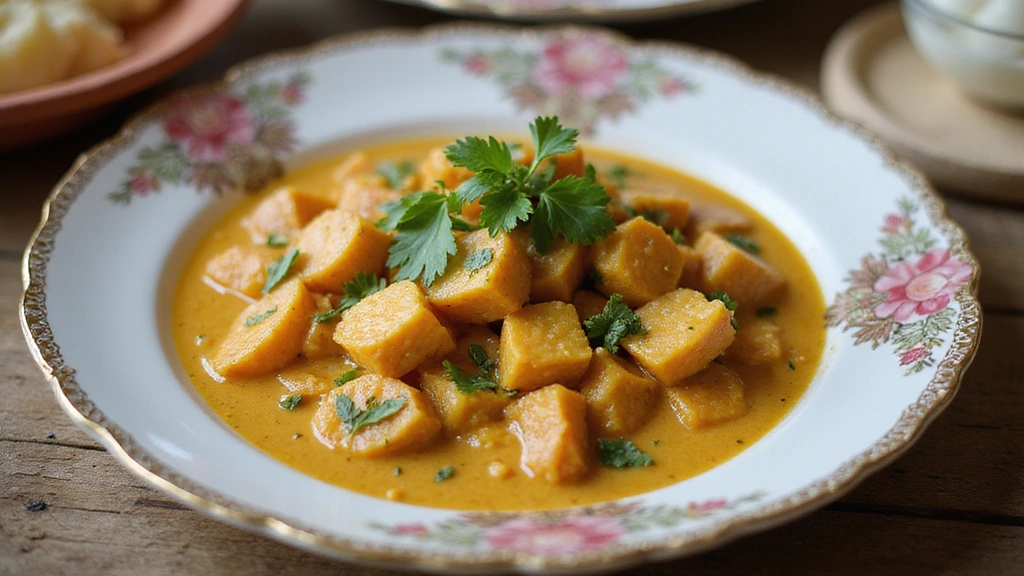
Step 8: Serve and Garnish

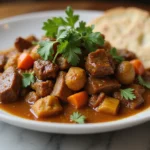
Ladle the creamy curry into serving bowls.
Garnish with fresh cilantro or parsley for a pop of color.
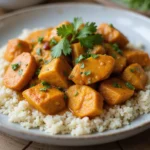
Serve it hot with rice or naan for a complete meal.
Presentation matters, so arrange the bowls attractively on the table.
Critical Timing and Temperature Guide
Sautéing Onions: Cook until translucent, about 5-7 minutes; avoid burning for the best flavor.
Simmering: Allow the curry to simmer for 15-20 minutes; the vegetables should be tender but not mushy.
Incorporating Yogurt: Stir in yogurt off the heat; avoid boiling after this step to prevent curdling.
Pro Tips for Curry Recipes Without Coconut Milk But Still Creamy
• Ingredient Selection: Use high-quality yogurt for creaminess and tang; Greek yogurt works especially well.
• Preparation Secret: Blooming spices in oil enhances their flavors significantly.
• Temperature Management: Make sure all ingredients are at room temperature before cooking for more even cooking.
• Texture Enhancement: Blend a portion of the cooked vegetables if you prefer a smoother texture.
• Flavor Layering: Consider adding a splash of lemon juice just before serving for brightness.
• Make-Ahead Strategies: Prepare the base and store it in the fridge for up to 2 days; add yogurt just before serving.
• Restaurant-Quality Finishing Touches: Drizzle with a touch of olive oil and sprinkle with freshly chopped herbs before serving.
• Equipment Optimization: A heavy-bottomed pot helps prevent burning and ensures even cooking.
Troubleshooting Common Issues
• Texture Too Thin: If the curry is too watery, simmer it uncovered for longer to reduce the liquid.
• Flavors Unbalanced: Adjust seasoning gradually; add salt or a splash of acid to balance flavors without overpowering.
• Curdled Yogurt: If yogurt curdles, whisk in a bit of warm curry before adding it to the pot to temper it.
• Vegetables Undercooked: Ensure you cut vegetables evenly to promote uniform cooking; extend simmering time if needed.
• Burning at the Bottom: Stir frequently and adjust heat as needed during cooking to prevent sticking.
Variations and Regional Differences
• North Indian Style: Often includes paneer and a richer sauce made with cashew paste, adding depth and creaminess.
• Thai Style: Uses a base of blended herbs and spices, often incorporating tamarind for a unique tang.
• Punjabi Style: Features tomatoes and a mix of spices, emphasizing a robust flavor profile with a creamier texture from adding more dairy.
• Modern Interpretations: Incorporating plant-based creams or nut-based sauces for vegan-friendly options.
Food Science Behind the Recipe
• Emulsification: The process of combining yogurt into the dish creates a stable emulsion, providing creaminess without separation.
• Flavor Development: Sautéing releases aromatic compounds from onions and spices, enhancing the depth of flavor.
• Caramelization: Cooking vegetables until they are golden brown adds sweetness and complexity to the dish.
Frequently Asked Questions
What’s the most common mistake people make when preparing curry? Many people overlook the importance of blooming spices, which enhances their flavor and aroma.
Can I prepare components of this dish in advance? Yes, you can chop vegetables and prepare the base ahead of time; store in the refrigerator for up to 2 days.
How do I adapt this recipe for dietary restrictions? Substitute yogurt with dairy-free yogurt or cashew cream for a vegan version.
What’s the best way to store and reheat leftovers? Store in an airtight container in the refrigerator for 3-4 days; reheat gently on the stove to maintain texture.
Can I freeze this dish? Yes, freeze in portions for up to 3 months; thaw overnight in the refrigerator before reheating.
What wine or beverages pair best with this dish? A light-bodied red or a crisp white wine complements the spices beautifully.
How can I scale this recipe up for a crowd? Increase all ingredients proportionately; ensure your pot is large enough for even cooking.
What side dishes complement this recipe best? Serve with basmati rice or naan for a complete meal experience.
How do professional chefs elevate this dish for restaurant service? They often use garnishes like microgreens or edible flowers for visual appeal.
Serving and Presentation Guide
• Traditional Presentation: Serve in wide, shallow bowls, garnished with fresh herbs and a drizzle of cream for visual contrast.
• Modern Plating Ideas: Utilize minimalist plating techniques with a central scoop of curry and a side of rice or naan artfully arranged.
• Accompaniment Suggestions: Pair with cucumber raita or pickles to enhance the flavors.
• Special Occasion Presentation: Use elegant serving dishes and consider layering flavors with an assortment of garnishes.
Conclusion
I hope you enjoy creating these creamy curry recipes without coconut milk as much as I do.
They offer a delightful depth of flavor and texture that will impress your family and friends.
Don’t hesitate to experiment with different ingredients and spices to make it your own.